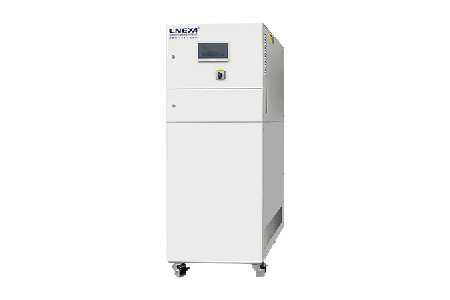
 LNEYA Industrial Chillers Manufacturer Supplier


How to Clean Your Water Chiller
Many users search how to clean a water chiller when cooling efficiency drops, or when they notice cloudy water, scale buildup, or rising outlet temperatures. A dirty water chiller doesn’t just waste energy, it strains pumps, clogs heat exchangers, and shortens equipment life.
The good news is that regular cleaning can restore performance fast. In this guide, you’ll learn practical, step-by-step methods to clean your water chiller, remove scale safely, prevent algae growth, and keep your system running efficiently all year round.
Why Cleaning Your Water Chiller Is Essential
Regular cleaning keeps your water chiller efficient, prevents scale buildup, and avoids costly breakdowns. It directly affects cooling performance and system life.
When dirt, scale, and biofilm collect inside a chiller, heat transfer drops fast. Pumps work harder, and compressors run longer to reach the same temperature. That wastes energy and wears out components early.
In industrial chillers, even a thin layer of scale can cut efficiency by 10%. Cleaning removes this buildup, protects copper and stainless-steel surfaces, and keeps water flow stable. It also prevents corrosion caused by trapped debris and stagnant water.
Skipping regular cleaning often leads to water discoloration, high-pressure alarms, and sudden shutdowns. Once fouling spreads through the condenser or evaporator, repair costs rise sharply. Cleaning is not just a maintenance task. It’s a way to protect your investment and ensure consistent performance.
How Often Should You Clean a Water Chiller
Clean your water chiller every 3 to 6 months, depending on water quality and operating hours. Systems in dusty or humid environments need more frequent cleaning.
If your chiller runs continuously or uses untreated water, schedule cleaning every quarter. For systems with closed loops and filtered water, semiannual cleaning is often enough. Check the water clarity, conductivity, and flow rate each month. These numbers help decide if early cleaning is needed.
Always flush the water circuit before refilling with fresh coolant. Neglecting this step can trap old debris that clogs filters again. For stable performance, keep a cleaning log to track intervals and results. This habit helps prevent major fouling before it becomes a repair issue.
Signs Your Water Chiller Needs Cleaning
When you notice these symptoms, act fast. Cleaning the system early prevents permanent damage to the evaporator and pump. It restores proper flow, lowers power use, and extends chiller life. Regular inspection helps you catch these signs before they turn into downtime.
Step-by-Step Guide: How to Clean a Water Chiller
Cleaning a water chiller means more than removing dirt. It restores cooling efficiency and extends system life. Follow these four practical steps to clean your chiller safely and effectively. Each step focuses on protecting internal parts, improving heat transfer, and preventing scale buildup.
Step 1 – Turn Off and Drain the System
Always turn off the power and drain all water before cleaning. This prevents short circuits and protects pumps and sensors.
Unplug the chiller and isolate it from the water source. Open the drain valves and remove all water from the tank and pipes. Use a wet vacuum if needed to clear residue. Wipe down the inside of the reservoir with a soft cloth.
Check the filters and strainers while draining. If they look clogged, rinse them under running water. Never clean the chiller while it is connected to power or running, as that can damage the control board or sensors.
Step 2 – Clean the Water Circuit and Heat Exchanger
Use a chemical cleaner designed for chillers to flush the water circuit and dissolve internal scale. Keep the flow steady during this process.
Mix the cleaner according to the manufacturer’s ratio. Fill the system and circulate for 30 to 60 minutes to remove mineral buildup. Watch for cloudy discharge, which means the cleaner is working. Once the water runs clear, drain and rinse twice with clean water.
Inspect the heat exchanger. If you see any white deposits or algae, soak the coil in mild citric acid for 15 minutes. Rinse completely. Never use strong acid or metal brushes, as they can damage copper tubing and seals.
Step 3 – Clean the Condenser and Cooling Tower Circuit
Cleaning the condenser and cooling tower keeps airflow smooth and prevents system overload. Dirt and algae in these parts reduce efficiency.
For air-cooled units, blow off dust using compressed air or a soft brush. Spray the condenser fins with a coil cleaner and rinse gently. Avoid high-pressure water—it can bend the fins.
For water-cooled chillers, clean the cooling tower loop. Drain the basin, remove sludge, and scrub algae from surfaces. Use a biocide that targets bacteria and slime. Rinse well and refill with treated water. Regular cooling tower cleaning prevents fouling and extends chiller life.
Step 4 – Refill and Test the System
After cleaning, refill the chiller with clean water and check for leaks before restarting. This step confirms that the system is safe and balanced.
Use filtered or deionized water to reduce mineral buildup. Fill the reservoir to the marked level and vent trapped air from the circuit. Power on the unit and monitor flow rate, pressure, and temperature.
Run the chiller for 15 to 20 minutes. If you see bubbles, adjust the flow until stable. Check that the outlet temperature matches the set point. Proper testing ensures efficient performance and verifies that the cleaning worked.
What Cleaning Chemicals Are Safe for Water Chillers
Use non-corrosive, biodegradable cleaners that remove scale and biofilm without harming metal parts. Always match the chemical to your chiller’s materials.
Most users rely on neutral-pH descalers made for stainless steel and copper systems. Acid-based agents, like mild citric blends, work well for calcium or lime deposits but must be rinsed fully to prevent corrosion. For biological growth, use chlorine-free biocides that kill bacteria without damaging seals or sensors.
Avoid strong acids like hydrochloric or sulfuric acid—they eat through metal surfaces and destroy gaskets. Always circulate cleaning fluid for the recommended time and flush with clean water afterward. This keeps the refrigerant circuit and heat exchanger safe.
Can You Use Vinegar or Citric Acid to Clean a Water Chiller
Yes, you can use vinegar or citric acid for light cleaning, but only for mild scale or residue. They are gentle options for small water chillers.
Vinegar dissolves mineral buildup and helps neutralize bacteria in the water circuit. However, it can leave a sour smell and should be rinsed out completely. Citric acid works better for calcium scale and offers stronger cleaning without harming copper or stainless-steel parts.
For industrial chillers, these household acids may be too weak for thick scale or algae. In that case, switch to professional-grade cleaners with corrosion inhibitors. Always wear gloves and check material compatibility before using any acid.
How to Prevent Scale and Algae Growth After Cleaning
After cleaning, maintain proper water quality and keep circulation steady to stop new buildup. Add inhibitors or filters to protect your water-cooled chiller long-term.
Use treated or deionized water whenever possible. Install inline filters to catch dust and rust particles. Keep the water tank covered to block sunlight, since algae grow fast in warm light-exposed water. Maintain flow speed to avoid stagnant spots where bacteria thrive.
You can also add low-dose biocides or antifouling agents designed for chiller systems. These keep water clear and reduce the need for frequent manual cleaning. Consistent maintenance keeps your chiller operating like new.
Common Mistakes to Avoid When Cleaning a Water Chiller
Many users damage their chillers by using the wrong chemicals, skipping flushing, or cleaning too aggressively. Proper care protects performance and avoids expensive repairs.
Some common mistakes include:
Avoiding these errors keeps your chiller safe and maintains stable cooling efficiency. A smart cleaning routine always includes chemical selection, full rinsing, and post-checks before use.
Keep Your Water Chiller Efficient and Reliable
A clean water chiller runs smoother, cools faster, and lasts longer. Regular cleaning keeps heat exchangers efficient, prevents scale buildup, and protects pumps and sensors. Even a quick monthly rinse and seasonal chemical flush can make a big difference in cooling performance and operating cost.
At LNEYA, our engineers design and build reliable, easy-to-maintain water chillers that simplify this process. We also provide maintenance checklists and service schedules to help you keep your chillers in top condition all year round.
FAQ


CONTACT US
TEL:
EMAIL:
WeChat & WhatsApp:

Wechat QR


