 Refrigeratori industriali LNEYA Produttore Fornitore


Chiller Installation Checklist:What Every Buyer Needs To Know
The installation of the chiller directly affects the cooling effect, energy consumption and service life. A perfect installation can avoid repeated debugging and help you save high maintenance costs. This article details the complete installation steps.
Preparation before installation
Check equipment specifications and parameters
Before installation, check whether the received equipment is completely consistent with the purchase requirements. Check the nameplate of the chiller, which has the model, type, power requirements, size and other parameters of the equipment. Observe the appearance of the equipment, whether the condenser fins, pipe joints, and control panel are deformed during transportation, and whether the size and position of the water inlet, outlet, drain, and signal interface match the on-site pipeline. Whether the package comes with instructions, warranty cards, electrical drawings, sensor probes, joints, anchor bolts and other necessary accessories. If it does not meet expectations, contact the chiller supplier in time to determine the solution before installation.
Determine the installation environment
Chillers have strict requirements for the installation environment. Heavier chillers should be installed on a stable ground, and the foundation must be able to bear the weight of the equipment. If the ground is uneven, it must be corrected and shock pads or anchor screws must be installed. If your equipment is an air-cooled chiller, make sure there is no obstruction around its air outlet and air inlet, and the space is well ventilated.
Power supply and wiring
According to the rated power and starting power of the equipment, select a transformer or main power supply with sufficient capacity. Select the appropriate cable according to the current parameters on the equipment nameplate. Use flame-retardant cables and route them through conduits or cable trays to prevent exposure or contact with the ground.Configure dedicated air switches, circuit breakers and leakage protectors to avoid sharing circuits with other high-power equipment.
Read the installation guide
The chiller manufacturer will provide an installation guide and wiring drawings. The installer must read carefully and understand the detailed installation process and precautions. All installation steps must be performed by qualified professionals to avoid danger.
Tools
To avoid frequent delays during installation, prepare all necessary tools and materials in advance.
| Tool | Purpose |
| Adjustable wrench / Allen key | Secure piping and fittings |
| Multimeter | Check voltage, current, and grounding |
| Vacuum pump | Evacuate the system before adding refrigerant |
| Torch and copper pipe | Weld refrigerant lines if needed |
| Insulation foam / Zip ties | Insulate and organize piping |
| Sealant / PTFE tape | Prevent leaks at pipe connections |
Key points for inspection during installation
Cooling water system
Make sure that the cooling tower and water pump are connected to the cooling system and the water flow direction is correct.
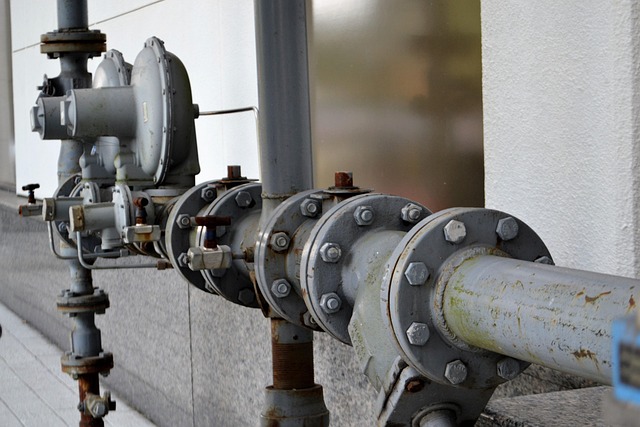
Cooling water piping
The pipe diameter should comply with the equipment instructions to avoid affecting the flow rate. Use well-insulated PPR pipes, stainless steel pipes or copper pipes, add sealing tape or use sealant to ensure that there is no leakage at the pipe interface. There must be a Y-type filter in the pipeline to prevent impurities from entering the heat exchanger.


Electrical connection
Make sure that all wiring is not loose and the labels are clear for later maintenance. Check whether the cable is exposed or damaged, and whether the grounding connection is reliable. Test whether the control panel and external control systems such as PLC and remote monitoring can operate normally.
Refrigerant filling
Some equipment is not equipped with refrigerant at the factory and needs to be added during installation. The refrigerant recommended by the supplier should be used to prevent incompatibility with the equipment. Before filling, professionals use tools to vacuum to ensure that there is no air and moisture in the pipe. The filling amount of refrigerant also needs to meet the manufacturer’s recommendations and check for leaks.

Debugging and first start-up
• Initial coolant filling
Add coolant according to the type and proportion recommended by the supplier, and ensure that the liquid level is within the normal range of the window.
• Exhaust
To avoid blockage, idling of the water pump, or even burning of the pump, it is necessary to open the vent valve or loosen the high point joint to completely remove the air in the pipeline.
• Electrical inspection
Measure the voltage and current at each connection point to ensure the three-phase voltage is balanced. Use a multimeter to check for any short circuits or leakage.
• Initial operation
After starting the compressor, check whether the sound of its operation is normal. Observe whether the current, temperature, pressure, flow and other parameters are within the normal range on the touch screen. Check the control system response sensitivity, such as temperature control, alarm, and linkage functions.
Common problems after installation
• Chiller troubleshooting
• Common chiller failures and solutions
• Chiller summer maintenance
• Chiller loud noise causes and solutions
• Chiller overheating causes and solutions
• Low chiller cooling efficiency causes and solutions
• Chiller tripping causes and solutions
• Refrigerant leakage causes and solutions
How LNEYA can help you?
The installation of the chiller is very complicated and must be performed by professionals. If you think it is troublesome to be responsible for yourself, LNEYA can provide you with a plug-in integrated chiller and free installation and commissioning services. You only need to explain your needs to our experts, confirm the design plan, place an order, and wait for delivery. We will take care of all other processes.
❯ Choose LNEYA and enjoy hassle-free cooling
Related chillers


CONTATTO
TEL:
EMAIL:
WeChat & WhatsApp:

Wechat QR

Hai domande o hai bisogno di un preventivo? Compila il modulo sottostante e il nostro team ti risponderà entro 24 ore.

